Portlet Development in eXo Platform with JSF and RichFaces (Part 1/3)
eXo Platform comes with a set of advanced portlets to build rich applications quickly. But you may want to develop your own portlets to fit your needs.
The development of a portlet using the raw portlet API can be a bit painful; it is often preferable to use a higher-level framework such as JSF. JSF is a request-driven MVC web framework based on a component-driven UI design model, and is part of the JEE standard.
This article is the first of a set of three tutorials that will teach you how to develop a portlet with JSF 2.0 and RichFaces 4, and leverage eXo Platform content and social capabilities.
RichFaces is a set of advanced JSF components that will allow us to add even more richness to our applications.
The source code of this first tutorial is available here.
Prerequisites
- Download the latest version of eXo Platform 3.5.
- Install and configure Apache Maven.
To be able to run a JSF application in a portal context, we need a JSF Portlet Bridge. This technology is also part of the JEE standard, and thus several implementations are available. For this tutorial the JBoss implementation will be used, but you don’t have to install anything as it will be added as a library in your portlet via Maven.
Creating the JSF Portlet Bridge project
The JBoss JSF Portlet Bridge project provides a Maven archetype to easily create a fresh JSF Portlet Bridge project with JSF 2.0 and the latest version of the Portlet Bridge (3.0.0.Beta1 at the time of writing). Type the following command:
mvn archetype:generate -DarchetypeGroupId=org.jboss.portletbridge.archetypes -DarchetypeArtifactId=2.0-basic -DarchetypeVersion=3.0.0.Beta1 -DgroupId=org.exoplatform -DartifactId=exo-jsfportletbridge-portlet
Maven will prompt you to change the default values of the project’s properties. You can leave the defaults unchanged by simply pressing Enter.
Your project is now created. However, some little changes need to be made to make it fully operational.
portlet.xml
- Change the portlet-app tag as follows:
<portlet-app xmlns="http://java.sun.com/xml/ns/portlet/portlet-app_2_0.xsd"
             version="2.0"
             xmlns:xsi="http://www.w3.org/2001/XMLSchema-instance"
             xsi:schemaLocation="http://java.sun.com/xml/ns/portlet/portlet-app_2_0.xsd
http://java.sun.com/xml/ns/portlet/portlet-app_2_0.xsd">- Move the portlet-info tag under the supports tag.
faces-config.xml
- Remove everything under the faces-config tag:
<faces-config xmlns="http://java.sun.com/xml/ns/javaee"
              xmlns:xsi="http://www.w3.org/2001/XMLSchema-instance"
              xsi:schemaLocation="http://java.sun.com/xml/ns/javaee http://java.sun.com/xml/ns/javaee/web-facesconfig_2_0.xsd"
              version="2.0">
</faces-config>
pom.xml
Optionally, the pom.xml file can be updated to use the latest available version of the JSF libraries by changing:
<properties>
  <jsf.version>2.0.3-b03</jsf.version>
</properties>
with the new value. For example:
<properties>
  <jsf.version>2.1.2</jsf.version>
</properties>
Your project is now ready, and can be built to be deployed in eXo Platform. You can build your project by launching the following command at the root of your project: .
A war file should be available in the target folder of your project ( by default).
Deploying the portlet in eXo Platform
The next step is to deploy the portlet in eXo Platform. To do so:
- Start eXo Platform 3.5;
- Once started, copy the war file of the portlet into the webapps directory. If the portlet deploys correctly, you should see the following lines in the console:
[date] org.apache.catalina.startup.HostConfig deployWAR
INFO: Déploiement de l’archive JSF2RIPortlet.war de l’application web
[date] com.sun.faces.config.ConfigureListener contextInitialized
INFO: Initialisation de Mojarra 2.1.2 (FCS 20110610) pour le contexte «/JSF2RIPortlet»
[date] javax.portlet.faces.GenericFacesPortlet init
INFO: Init GenericFacesPortlet for portlet riPortlet
[date] javax.portlet.faces.GenericFacesPortlet calculateBridgeClassName
INFO: Bridge class name is org.jboss.portletbridge.AjaxPortletBridge
The portlet has been deployed successfully in eXo Platform. It should now be added to a page of the portal:
- Go to ;
- Connect with john/gtn;
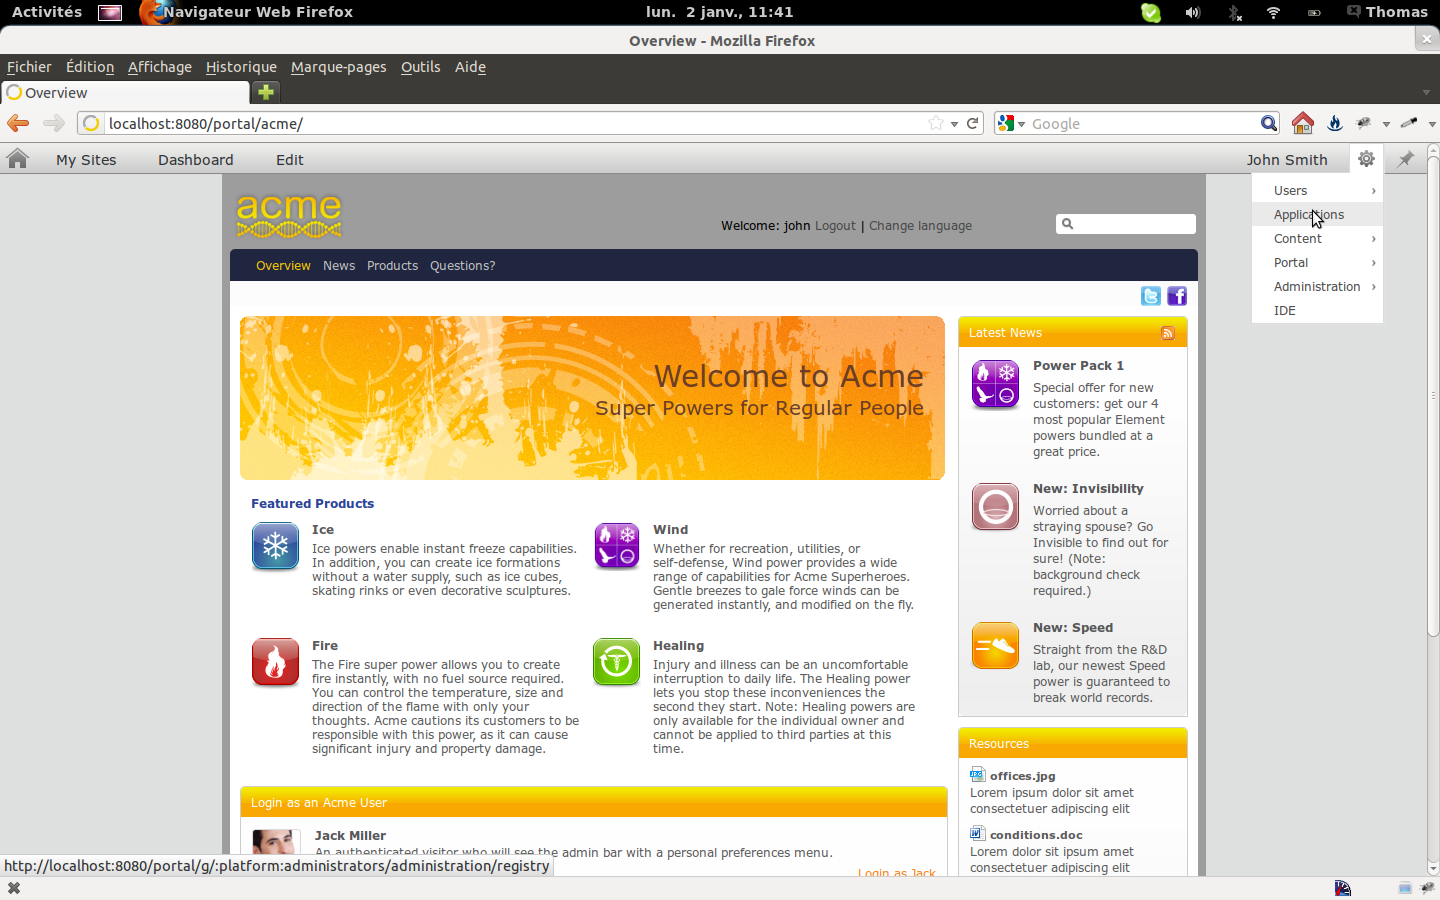
- Go to the Application menu;
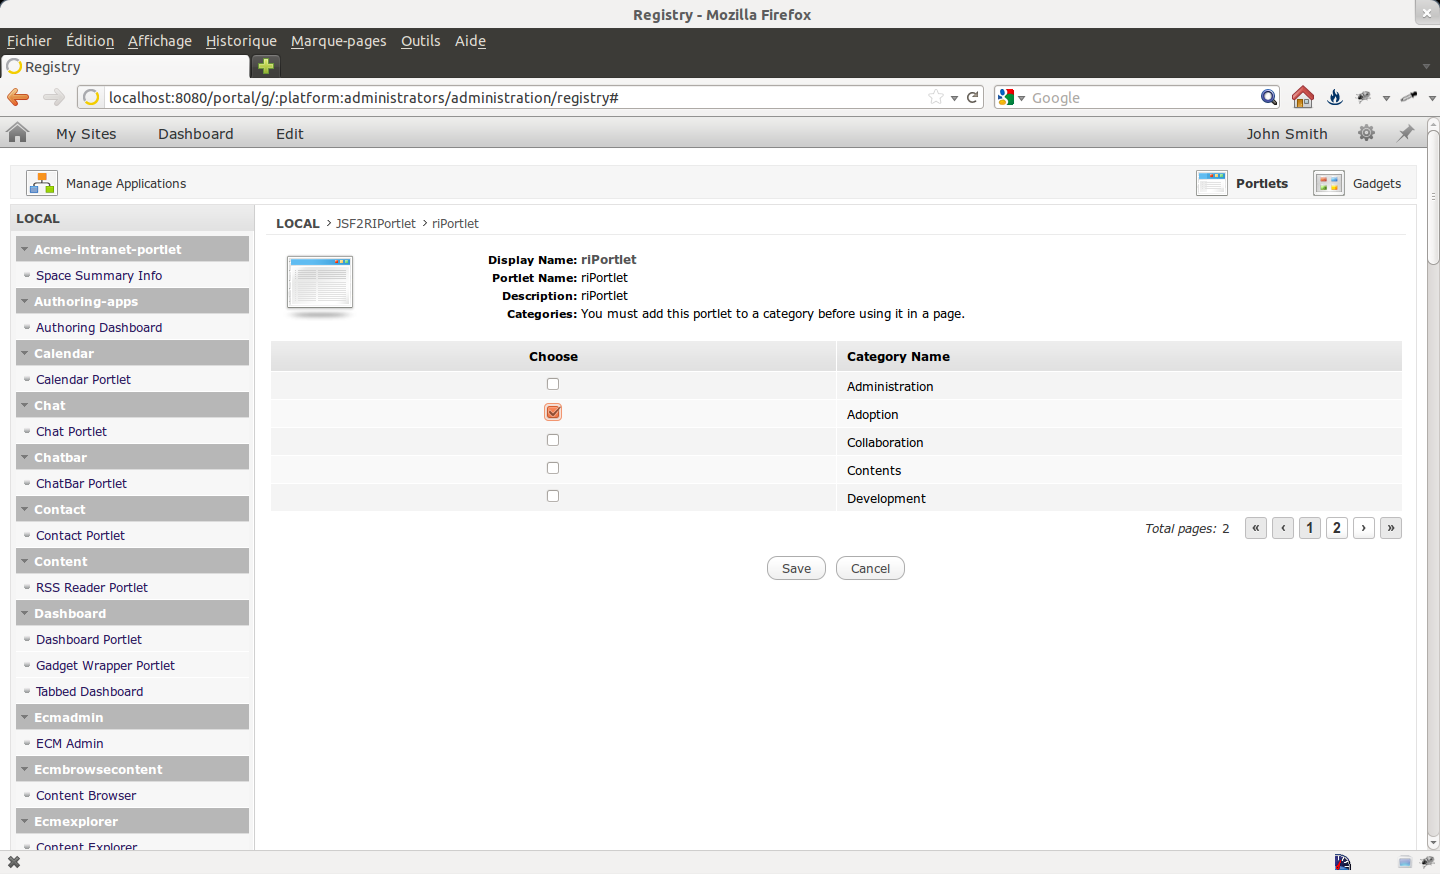
- Click on Portlets. The list of all the deployed portlets is available on the left side. We will now make the portlet addable to the portal’s pages;
- Select our portlet ( in the category);
- In the right part, click on “Click here to add this portlet to a category”;
- Select a category (Adoption, for example);
- Click on Save;
- Come back to the acme site’s home page ( in the top bar).
The next step is to create a page to contain our portlet:
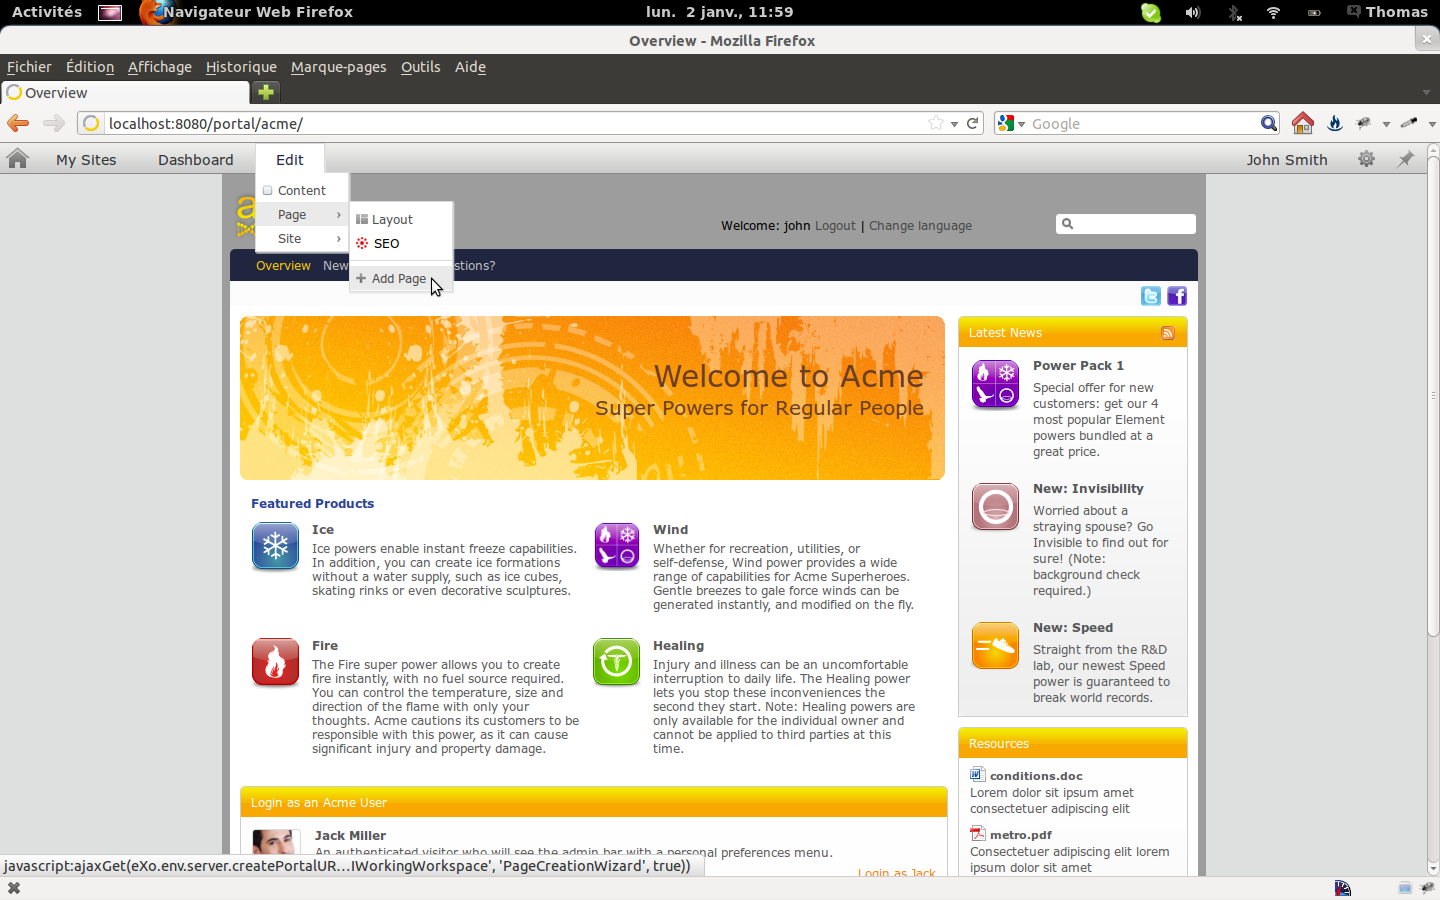
- In the top bar, click on in ;
- In the left side, click on the up arrow to add the page at the root;
- In the right side, enter “comics-store” as the name and “Comics Store” as the display name (guess what this tutorial will deal with!). Leave the other fields as they are. Note that you can easily define titles in other languages;
- Click on Next;
- We will use the default empty dashboard, so click on Next;
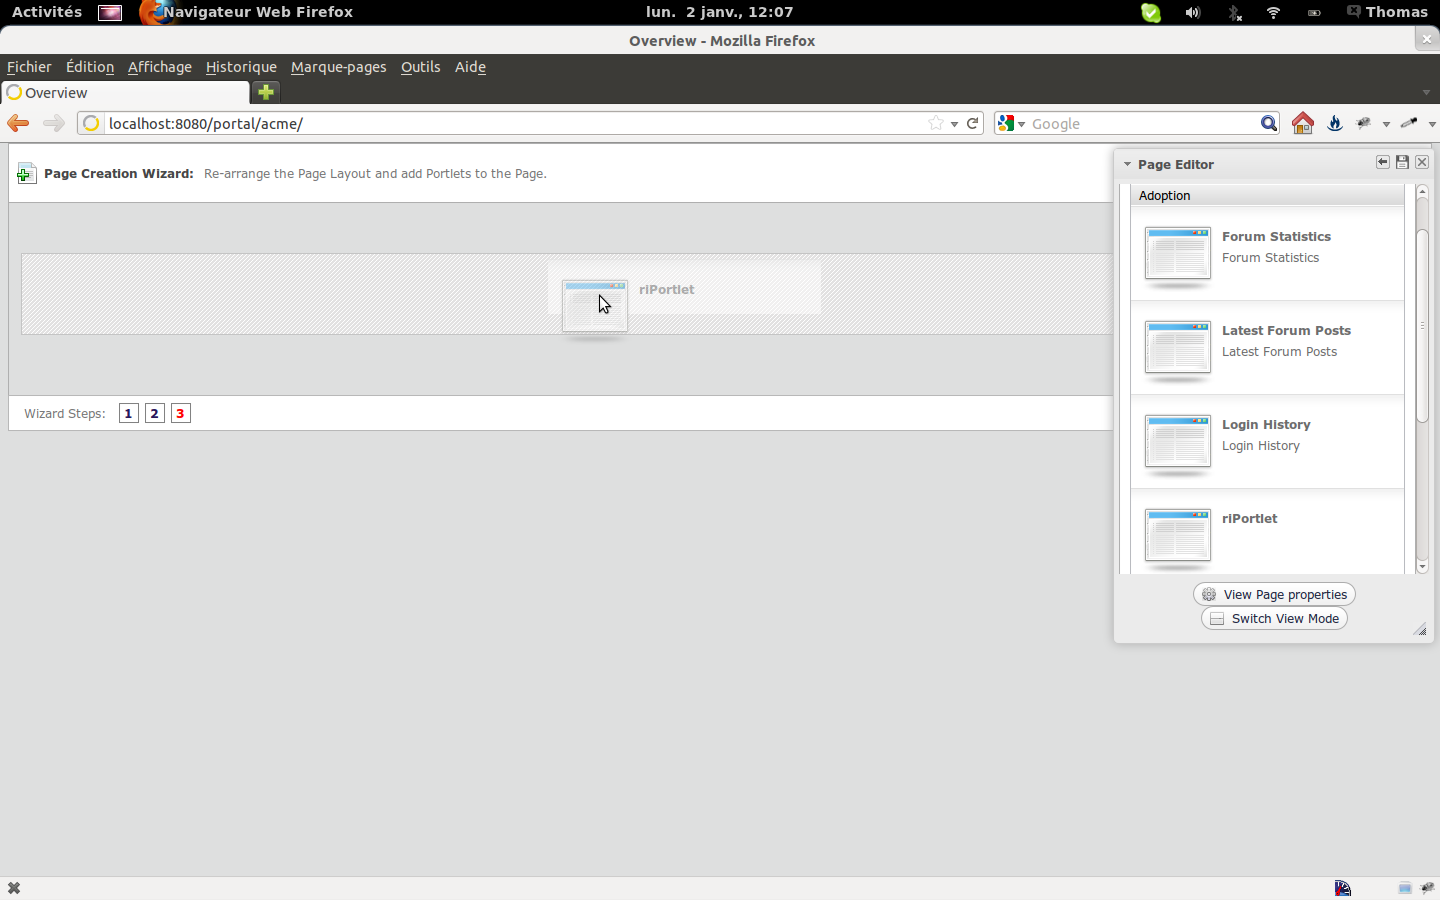
- In the portlet catalog, find the RiPortlet and drag it onto the page;
- Click on the Save icon (upper right).
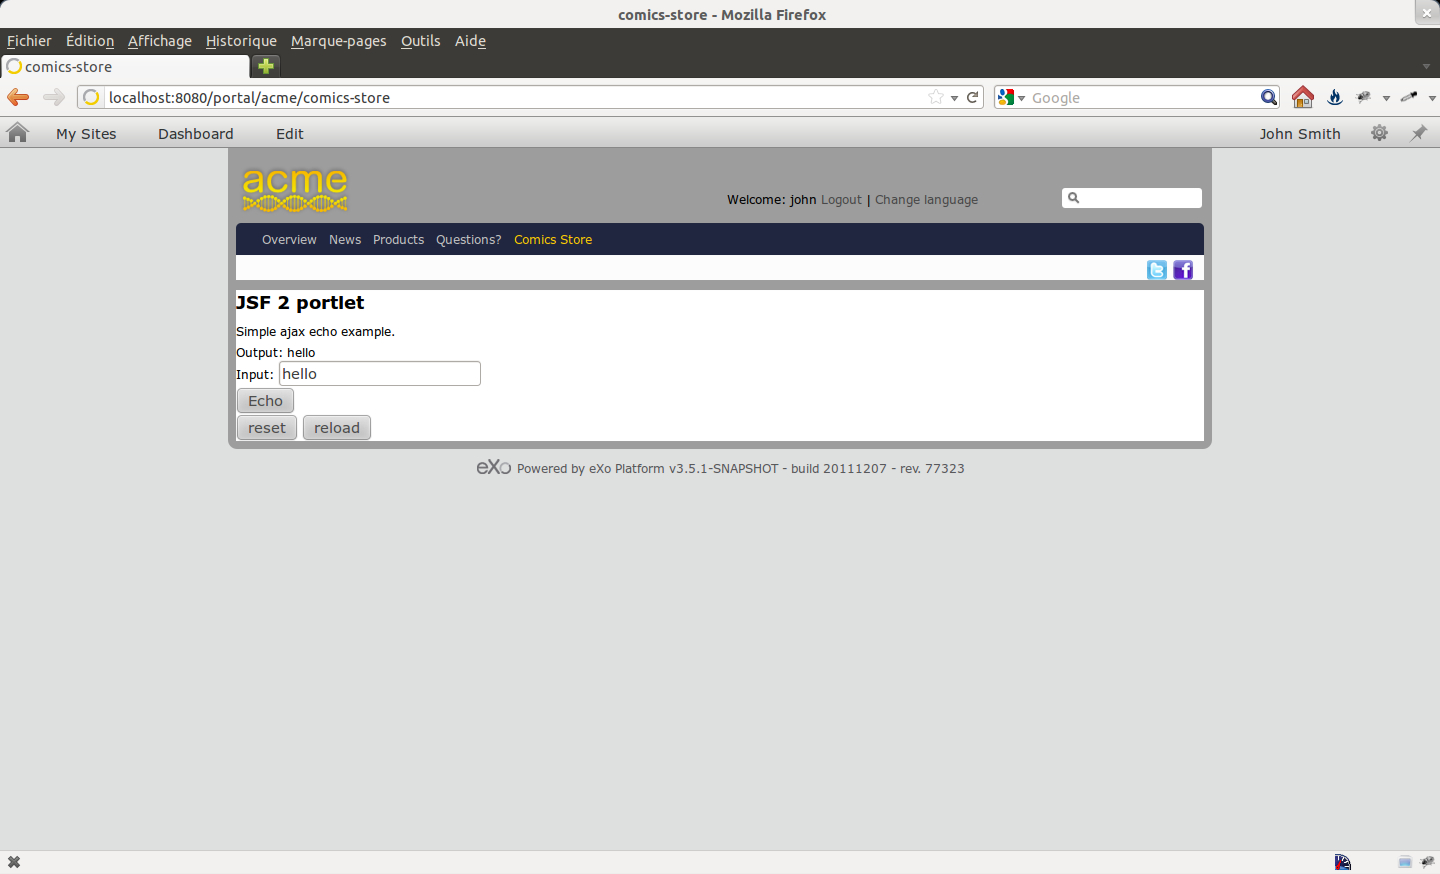
The portlet is now available on our new page:
Adding RichFaces
RichFaces is a set of advanced JSF components. To use it in your project, edit your file to add the following dependencies:
<dependency>
  <groupId>org.richfaces.ui</groupId>
  <artifactId>richfaces-components-ui</artifactId>
  <version>4.1.0.Final</version>
</dependency>
<dependency>
  <groupId>org.richfaces.core</groupId>
  <artifactId>richfaces-core-impl</artifactId>
  <version>4.1.0.Final</version>
</dependency>
Then, add the following lines to your :
<context-param>
  <param-name>org.richfaces.resourceMapping.enabled</param-name>
  <param-value>false</param-value>
</context-param>

<context-param>
  <param-name>org.richfaces.skin</param-name>
  <param-value>ruby</param-value>
</context-param>
Finally, in your JSF views, add the following namespace:
xmlns:a4j="http://richfaces.org/a4j" xmlns:rich="http://richfaces.org/rich"
You can now use all the RichFaces components in your pages.
As an example, we will add a tabPanel component to the page. The code is simply taken from the RichFaces demo website. Just edit the file and add these lines before :
<rich:tabPanel switchType="client">
  <rich:tab header="Overview">
    RichFaces is a component library for JSF and an advanced framework for
    easily integrating AJAX capabilities into business applications.
    <ul>
      <li>100+ AJAX enabled components in two libraries</li>
      <li>a4j: page centric AJAX controls</li>
      <li>rich: self contained, ready to use components</li>
      <li>Whole set of JSF benefits while working with AJAX</li>
      <li>Skinnability mechanism</li>
      <li>Component Development Kit (CDK)</li>
      <li>Dynamic resources handling</li>
      <li>Testing facilities for components, actions, listeners, and pages</li>
      <li>Broad cross-browser support</li>
      <li>Large and active community</li>
    </ul>
  </rich:tab>
  <rich:tab header="JSF 2 and RichFaces 4">
    <p>We are working hard on RichFaces 4.0 which will have full JSF 2 integration. That is not all though, here is
    a summary of updates and features:</p>
    <ul>
      <li>Redesigned modular repository and build system.</li>
      <li>Simplified Component Development Kit with annotations, faces-config extensions, advanced templates
support and more..</li>
      <li>Ajax framework improvements extending the JSF 2 specification.</li>
      <li>Component review for consistency, usability, and redesign following semantic HTML principles where
possible.</li>
      <li>Both server-side and client-side performance optimization.</li>
      <li>Strict code clean-up and review.</li>
    </ul>
  </rich:tab>
</rich:tabPanel>
Build your war file and copy/paste it into eXo Platform’s webapps directory. There’s no need to restart; the portlet is hot-redeployed!
You should see the following message in the console:
[date] org.apache.catalina.startup.HostConfig deployWAR
INFO: Déploiement de l’archive JSF2RIPortlet.war de l’application web
[date] com.sun.faces.config.ConfigureListener contextInitialized
INFO: Initialisation de Mojarra 2.1.2 (FCS 20110610) pour le contexte «/JSF2RIPortlet»
[date] org.richfaces.cache.CacheManager getCacheFactory
INFO: Selected fallback cache factory
[date] org.richfaces.cache.lru.LRUMapCacheFactory createCache
INFO: Creating LRUMap cache instance using parameters: {facelets.DEVELOPMENT=false, org.richfaces.resourceMapping.enabled=false, javax.faces.FACELETS_VIEW_MAPPINGS=*.xhtml, org.richfaces.skin=ruby, javax.portlet.faces.RENDER_POLICY=ALWAYS_DELEGATE, javax.faces.STATE_SAVING_METHOD=server, javax.faces.DEFAULT_SUFFIX=.xhtml}
[date] org.richfaces.cache.lru.LRUMapCacheFactory createCache
INFO: Creating LRUMap cache instance of 512 items capacity
[date] org.richfaces.application.InitializationListener onStart
INFO: RichFaces Core Implementation by JBoss, a division of Red Hat, Inc., version v.4.1.0.Final
[date] javax.portlet.faces.GenericFacesPortlet init
INFO: Init GenericFacesPortlet for portlet riPortlet
[date] javax.portlet.faces.GenericFacesPortlet calculateBridgeClassName
INFO: Bridge class name is org.jboss.portletbridge.AjaxPortletBridge
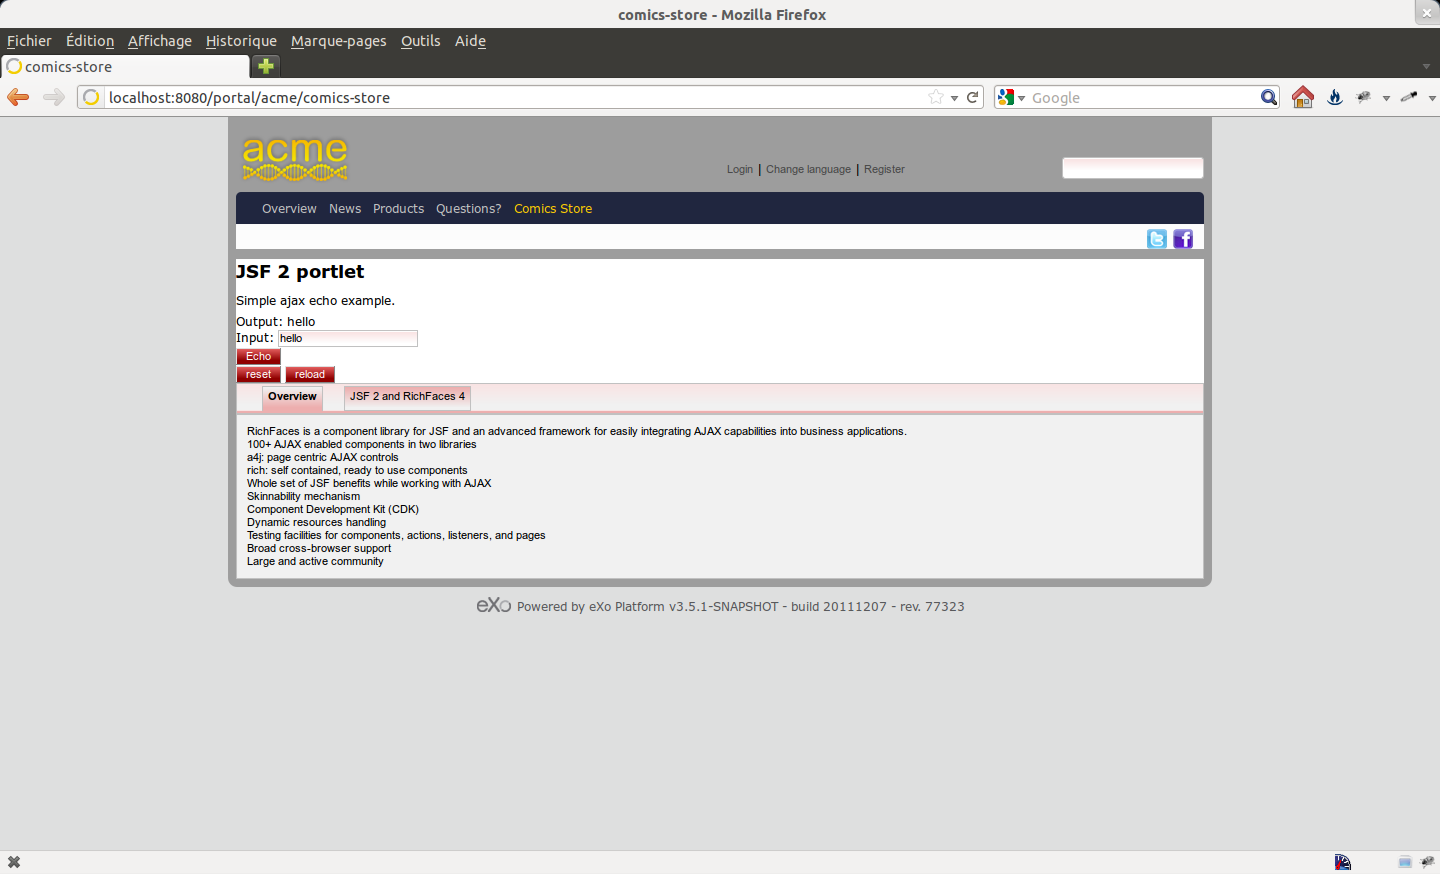
Just reload your portal page and the tabPanel component will appear:
Your JSF/RichFaces portlet is now fully working!
You may notice that the style of the elements on the page has changed. This is due to the skin capabilities of RichFaces. You can easily alter the style by changing the value of the context parameter in the file (you have set ‘ruby’ for this example). RichFaces comes with a set of ready-to-use skins, and you can of course create your own.
This tutorial has shown you how to create your own portlets easily using JSF, a standard Java web framework.
The next tutorials will show you how to leverage eXo Platform features in your business portlets.
