Extend eXo Cloud Drive to new cloud services with the Connector API: Architecture (Part 1 of 3)
Hello, eXo Tribe!
This is an update about the eXo Cloud Drive add-on—an add-on that connects cloud files into eXo.
Recently we introduced a feature of Cloud Drive enabling you to modify cloud documents directly from eXo Platform. This time, along with seamless synchronization and embedded access to files, we are adding support of Single Sign-On and open Connector API, which lets other developers create new extensions to connect more cloud services, such as Microsoft SharePoint or Dropbox, or maybe a connector to your software.
In this post I will introduce the Connector API and describe how to create a new connector for Cloud Drive, from developer conventions to installation in eXo Platform. Due to its length, this post is split into three parts and refers frequently to the add-on documentation for details and examples.
Cloud Drive connector is a set of Java interfaces implemented by the connector code with client scripts, pages, styles, and other files connected together by the conventions. Thanks to Connector API it’s possible to create connectors to new cloud providers without changing the add-on code or its configuration. Technically, the Cloud Drive add-on is a portal extension in eXo Platform, and each connector is also a portal extension that depends on the Cloud Drive extension.
Cloud Drive Architecture
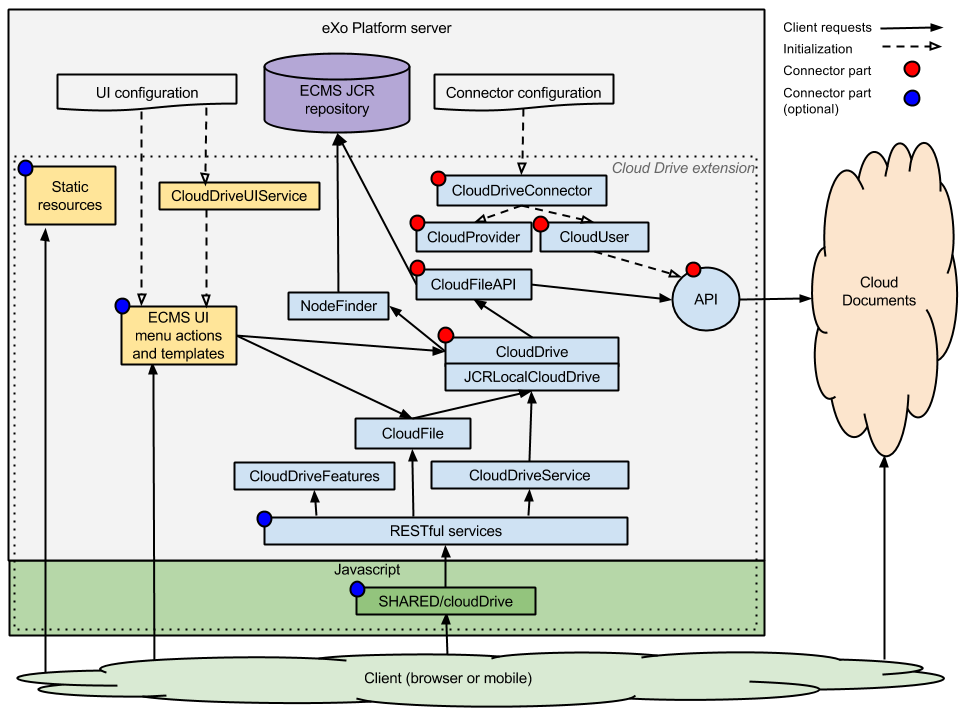
Let’s look at Cloud Drive architecture and see which parts of the add-on are extensible in connectors. In the diagram below, critical parts of Connector API are marked in red and optional ones are blue. All major parts should be implemented by any connector. Optional parts may be implemented if needed to add a control on additional features such as automatic synchronization, user interface post-processing and styles, or other client customizations.
As shown in the diagram, a client consumes both eXo Platform and cloud resources while working. Platform serves requests to portal UI and Cloud Drive’s web services to render cloud drive with proper menu actions and styles. Cloud services are used directly from the client (browser) to connect drives in embedded file view and, if connector supports, for synchronization initiation.
Platform’s server will load the Cloud Drive add-on via its extension configuration. Cloud Drive has embedded connectors (for Google Drive and Box.com), which are already configured in the add-on configuration. All third-party connectors will be loaded via their extension configurations.
Where To Start A New Connector
When planning a connector to Cloud Drive, first decide which cloud features you want to expose in eXo Documents. Then you just can be creative with Cloud Drive! You can find out how the add-on works functionally in the previous post. Programmatically, it offers an abstraction layer on top of the internal JCR storage used to store file stubs with metadata. This abstraction defines common properties of a drive with its files on the cloud side. Relying on this set of naming conventions and interfaces you will be able to decide on features and how to expose your cloud files in the eXo Documents app.
The overall Cloud Drive architecture consists of a server-side Java API and client support in a browser. Start working on critical parts in the Java API and then move on to the client side customizations when you want to start working on the user interface. Connector API is file-centric and highly compatible with the ECMS (JCR) virtual file system—take this in account when adapting features not explicitly related to the files system. For example, comments, projects, or tasks don’t describe a file as an entity and probably will need support in a dedicated custom code.
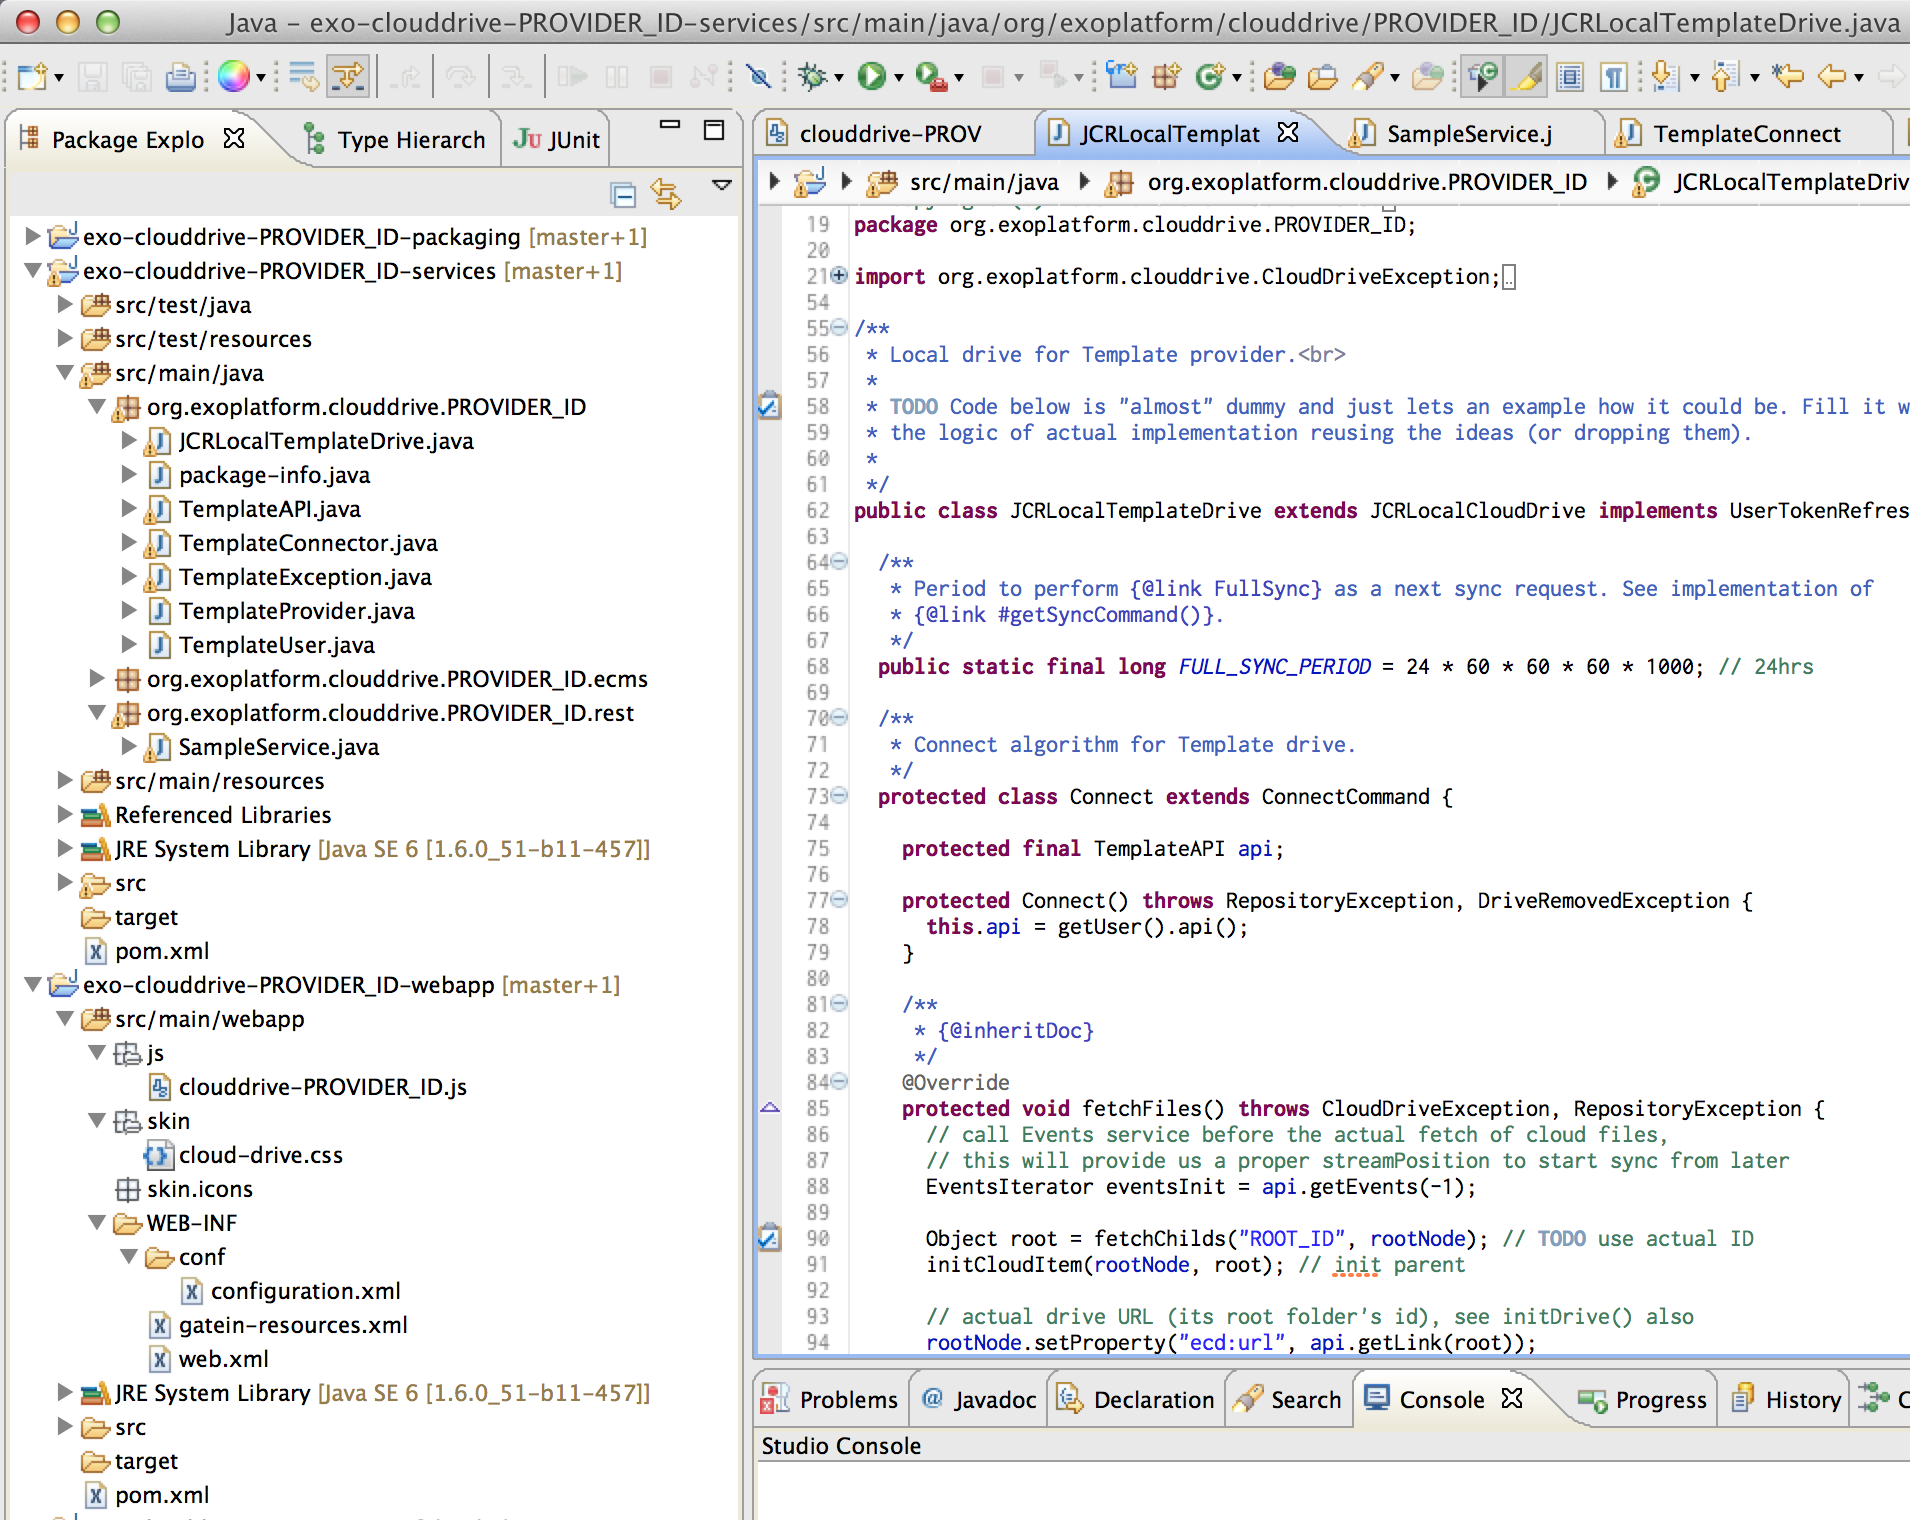
When you have an idea and know which features you will show in eXo, start engineering work from the connector’s project organization. You can reuse the existing template project to bootstrap the development—it contains Javadocs (recommendations to follow). Copy its files to a new location and start to code the connector plugin class, a programmatic entry point of the add-on. By working on its logic and digging into the details of Connector API you will understand the relationships better. I’ll talk about them in the next post.
A connector project imported in your IDE should look like the example below, a template project in Eclipse:
In the next post I will introduce a major component: the Java API.
Join the eXo tribe by registering for the community and get updates, tutorials, support, and access to the Platform and add-on downloads!
Make the most out of eXo Platform 4
Register to the next webinar and get a complete overview of what you can do with eXo Platform 4. Reserve your seat now!


