How to contribute to eXo Platform add-ons in 10 minutes with Che and Codenvy
Do you remember that a few months ago if you wanted to contribute to an open-source project, even to fix a minor issue, you had to:
- clone the project
- read the contribution manual
- check your Java version
- install the right package manager (Maven, Bower, npm or whatever you needed)
- download the right application server, setup your IDE as well
- run the init script, find out why it doesn’t work on your laptop, kill any other local applications on the server to fix the conflict … and so on!
It was so boring that in some cases you gave up on your fix because of all the annoying things you had to do.
But wait, this time is over!
In this post, I will show you how to work as a developer on the eXo Tasks Add-on and how you can quickly contribute to this open-source project without installing anything on your laptop, thanks to Eclipse Che and Codenvy! (Unless you don’t have a browser 😉 )
Codenvy is based on the open-source Eclipse Che project and can be extended and customized with Che plugins.
The eXo Tasks Add-on is a task management application that allows you to create and organize tasks in eXo Platform. If you want to know more about it, take a look at these two blog posts:
Fix a bug in an eXo add-on, then build, install and test your code and create a PR with just … a browser!
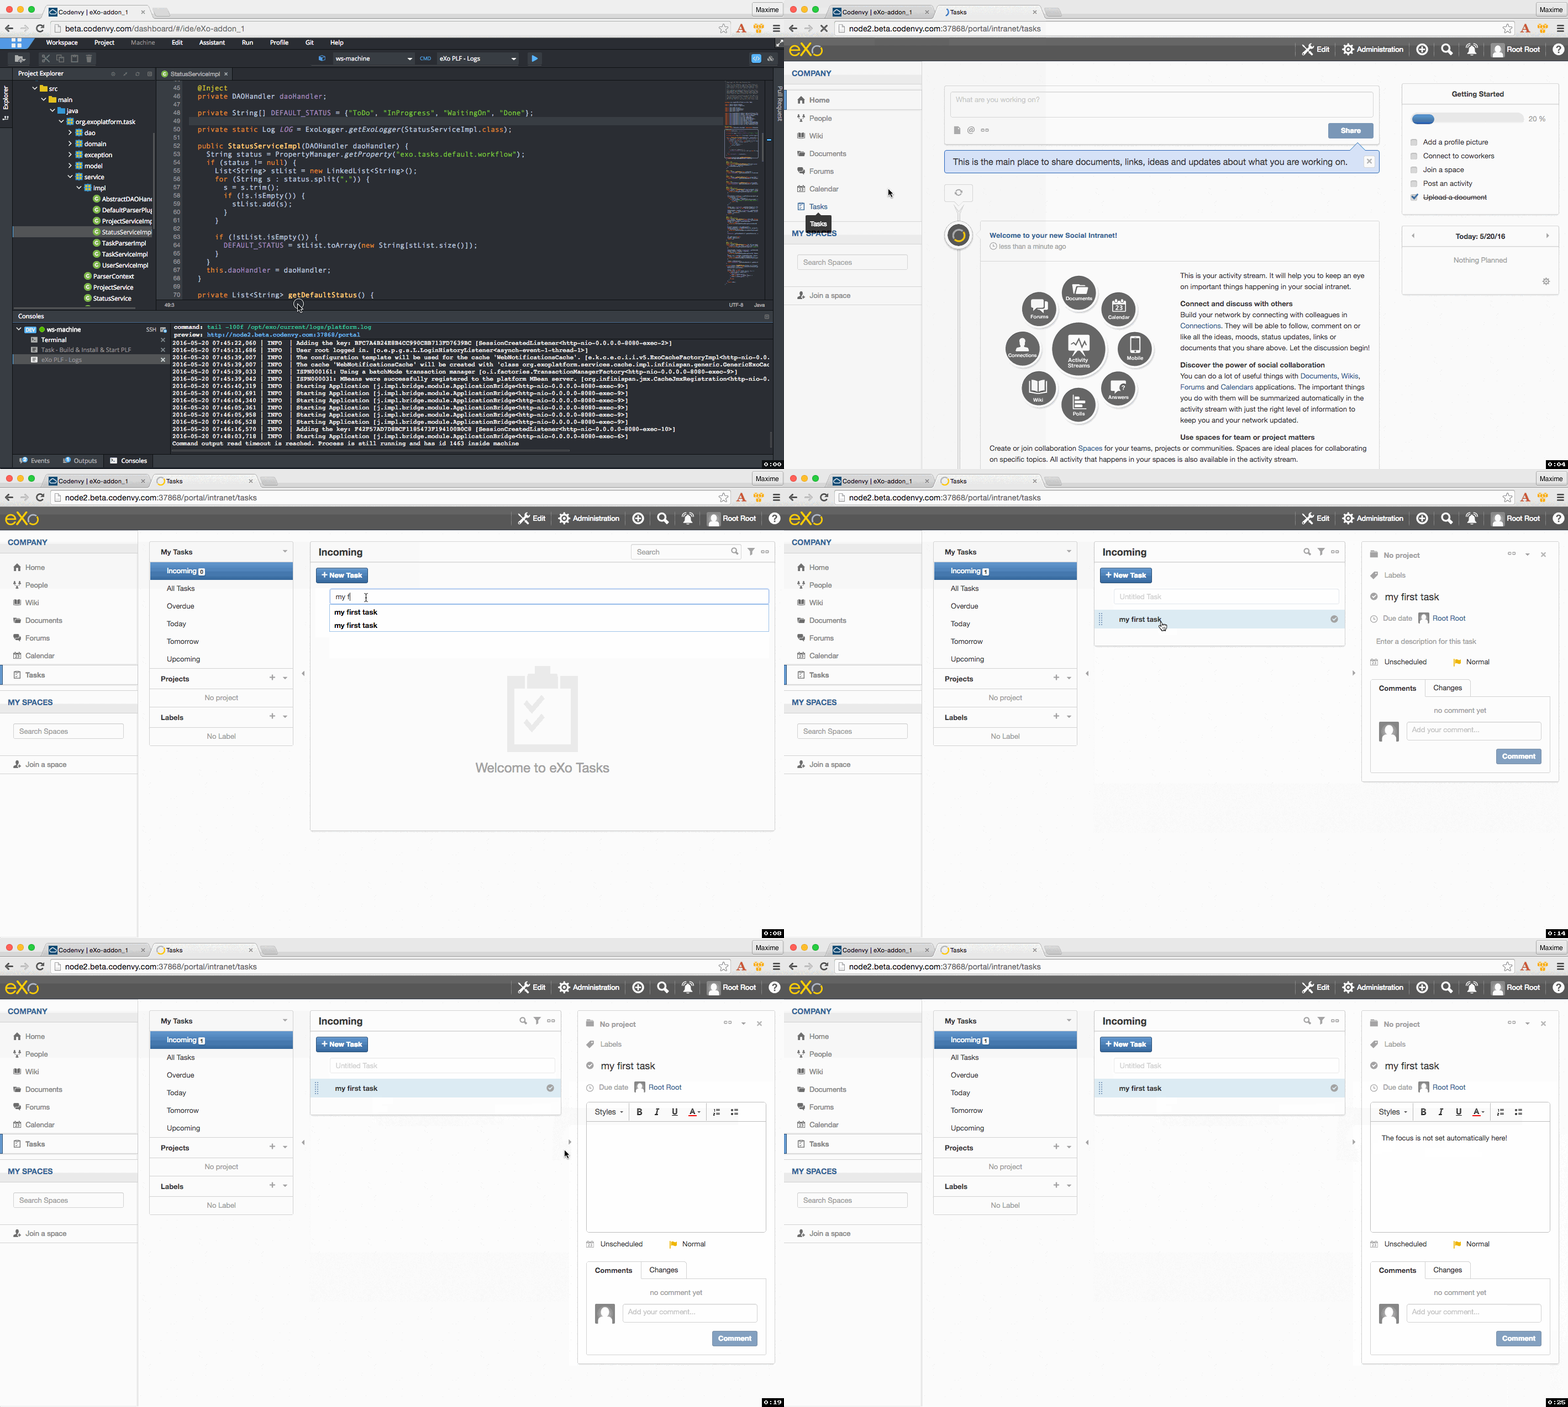
We are going to fix a very simple issue for the purposes of this demo. As you can see in the animated image below, when you want to edit a task description, you have to click on the dedicated rich editor area, but the focus is not set in the rich editor field.
Ok so now let’s fix it!
Start your developer workspace with one click
The first step is to go to the eXo Task GitHub project and to click on the { ☁ } Developer Workspace button.
When clicking on the button, it calls a Codenvy Factory. A Factory is a template used to generate a new developer workspace from a consumer-friendly URL. We created one dedicated for eXo Tasks which allows to automatically load a ready-to-use development environment.
NOTE: You need a Codenvy account to be able to use it. An account is free and you can create one quickly with your GitHub or Google+ accounts, for example.
When the workspace starts up, the following steps are automatically executed:
- The eXo Task Add-on project is checked out from GitHub.
- The project is configured as a Maven project.
- A custom command named “Task – Build & Install & Start PLF” is executed to build this add-on, install it to the local eXo Platform installation and start an eXo Platform instance.
You can follow these processes in the Terminal view at the bottom of the screen, where you can also find the link to access your eXo Platform instance with the default username (root) and password (gtn):
NOTE: Even if the preview URL is there from the beginning, you need to wait until the end of the command to be able to click on it so that your eXo Platform instance is ready to use.
A closer look at the commands
Eclipse Che and Codenvy allow you to create commands associated with your work space. As the eXo Tasks Add-on is a Maven project, there are some basic Maven commands available, like “clean package” and “clean test”.
In addition, we have created some useful custom commands:
- eXo PLF – Start
Starts the eXo Platform as a background process and displays the logs
- eXo PLF – Stop
Stops the Platform waiting for up to a few seconds for a process to end
- eXo PLF – Logs
Displays the platform.log content file in real time
- eXo PLF – Clean
Cleans up all the data to enable starting with a fresh instance
- Task – Build & Install
Builds the eXo Tasks project with Maven and installs it into (or updates it in) the eXo Platform installation with the eXo Add-on Manager.
- Task – Build & Install & Start PLF
Like the previous command, and in addition starts the eXo Platform instance after successful installation of the Add-on
As you can see on the screenshot below, those commands, available via the Run > Commands menu, can be easily updated:
These commands are enough to make you efficient in developing eXo Tasks out of the box, but you can also create your own commands. Feel free to create some and share them with us. We will be happy to improve the default commands based on your feedback.
Fix a bug, and then build, install and test your code on an eXo Platform instance
Now we are ready to fix the bug:
Ok, the fix seems to be good, let’s create a pull request 🙂
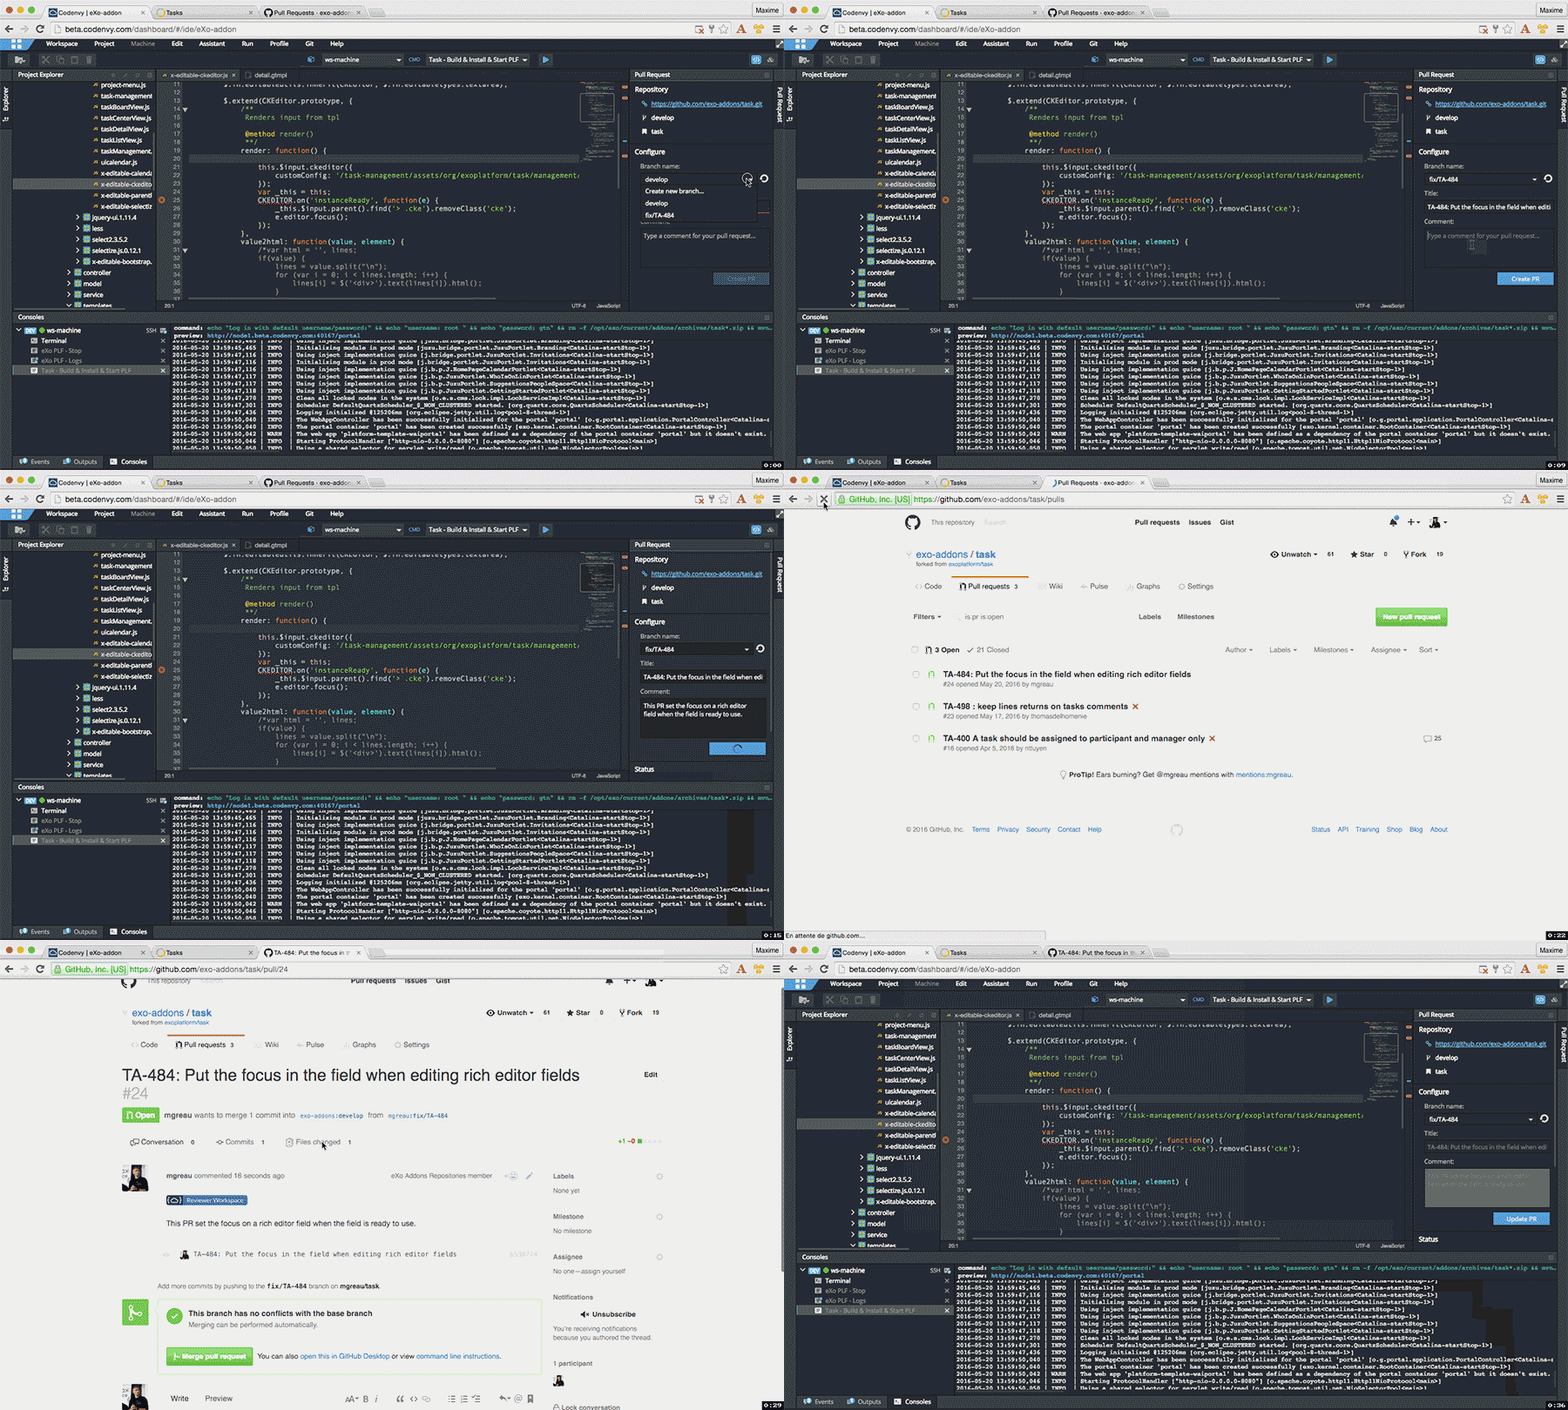
Create a Pull Request
To be able to create a pull request on GitHub, you first need to fill in the form on the Committer screen via the menu entry Profile > Preferences > Git > Committer:
Then, since the Task project has been checked out on the default Git branch (branch develop), you need to create a new branch. Let’s name it “fix/TA-484” here to follow eXo conventions, because we already have a JIRA opened for this bug:
- Click on the top menu: Git > Branches….
- Then in the dialog box that opens, click on the Create button from the default develop branch and name your branch:
- Select your new branch and click on the Checkout button.
- Finally, add any files that you have updated and commit them to the local Git repository using the Git > Add files and Git > Commit menu entries.
Now you can use the Pull Request panel on the right of the screen to enter all the details for the pull request you want to create:

NOTE: A fork of the project will be created on your GitHub account, so the first time Codenvy needs to access your account, a popup will ask you to validate some GitHub permissions.
This PR is available here.
Share your fix with the Engineering team, the QA team and others!
Now, that your PR has been created and seems to be ok, all other teams, like the QA Team for example, can easily test your code in the same development environment.
They just have to click on the { ☁ } Developer Workspace button available on the PR description and that’s it!
Indeed, when clicking on this button, it calls another Factory, automatically created by Codenvy with the PR, and loads a ready-to-use environment to help others to review this contribution and test it before accepting the PR.
As you can see, this PR has successfully passed all the eXo checks … but wait! It’s another subject and we will discuss about the PR Workflow used at eXo in another blog post. Stay tuned!


