4 Simple Steps to Add a Twitter Feed Gadget to Your Intranet Homepage
eXo Platform 4 provides many features for building rich websites out of the box. But you can also use the platform’s web-based IDE to build custom plug-ins or gadgets that add an almost limitless number of capabilities. We wrote a simple gadget that displays a Twitter feed of all the recent company-related tweets, which is an easy way to display fresh content on a site’s homepage. This tutorial will guide you through the process of creating the Twitter gadget and adding it to a website page.
To be able to complete this how-to, you will need eXo Platform Enterprise Edition 4.0 up and running.
Step 1: Generating the Twitter Widget
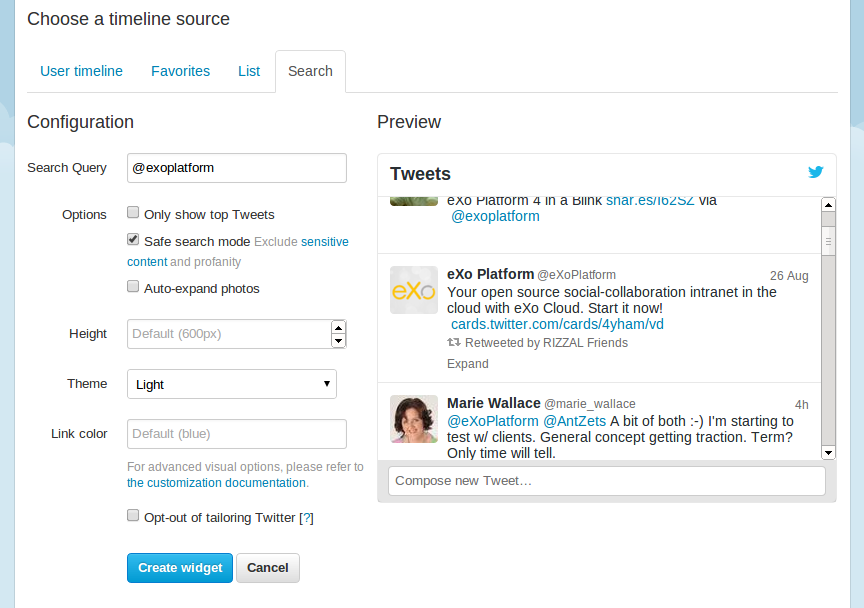
To integrate the standard Twitter gadget, first go to the Twitter widget page. Click “Create new” to create a new widget.
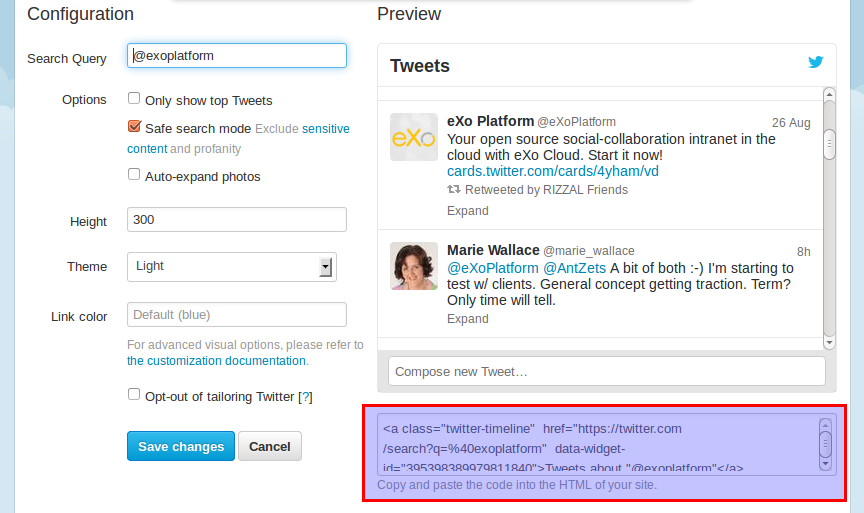
Switch to the Search tab and fill in the search query for the type of feed you want to display (in our case, we want to display any tweets from our company account or our CEO, so we entered @exoplatform or @benjmestrallet). Click on “Create widget”.
Copy the generated code.
Step 2: Creating the Gadget in your eXo Platform Intranet
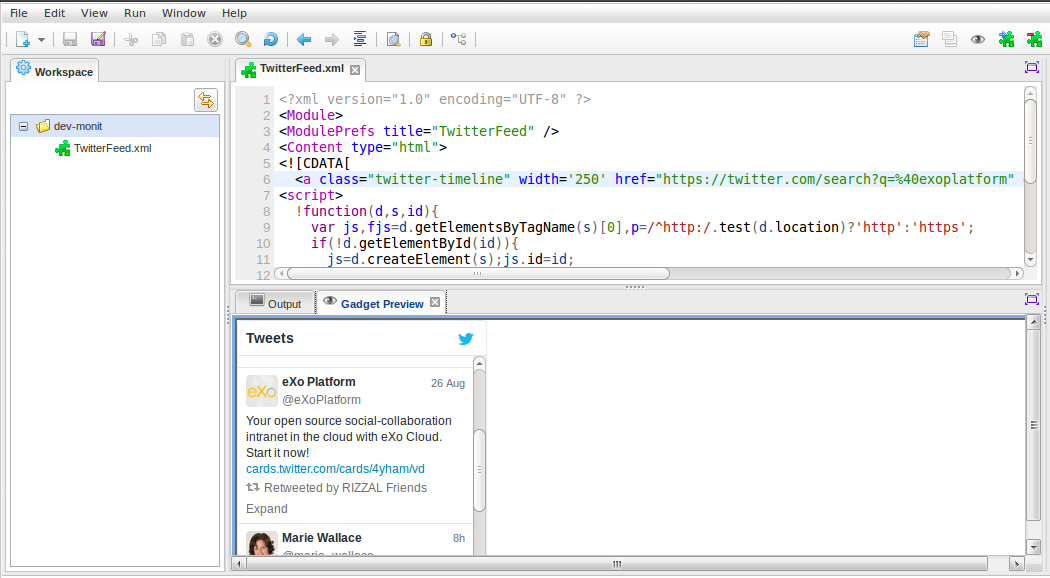
Log in to eXo Platform portal as an administrator. In the “Administration” dropdown menu, go to the IDE. In IDE app, select menu File à New à Google Gadget. Specify a name for your gadget (e.g., TwitterFeed.xml). In the CData tag, paste the widget code provided by Twitter.
Our code looks like this:
<?xml version="1.0" encoding="UTF-8"?>
<Module>
 <ModulePrefs title="TwitterFeed"/>
 <Content type="html">
 <![CDATA[
 <a class="twitter-timeline" width='250' href="https://twitter.com/search?q=%40exoplatform" data-widget-id="395398389979811840">Tweets about "@exoplatform"</a>
 <script>
        !function(d,s,id){
         var js,fjs=d.getElementsByTagName(s)[0],p=/^https:/.test(d.location)?'http':'https';
         if(!d.getElementById(id)){
                js=d.createElement(s);js.id=id;
                js.src=p+"://platform.twitter.com/widgets.js";
                fjs.parentNode.insertBefore(js,fjs);
         }
        }(document,"script","twitter-wjs");
 </script>
]]>
        </Content>
</Module>
If you want to see your gadget working from within the IDE, click on Run à Show preview from the menu.
To finish, go to the “Run” menu and click on “Deploy gadget to GateIn”.
Step 3: Adding the Gadget to the Application Registry
Before you can insert the gadget into a page, you need to make it available to webmasters by adding it to a category in the application registry. To do this, go to Administration à Applications. Click on the button “Gadget” and find your gadget on the list (we named ours “TwitterFeed”). When you are in your gadget, select “Click here to add into categories”. Choose the category “social” and validate.
Step 4: Inserting the Widget into Your Intranet Homepage
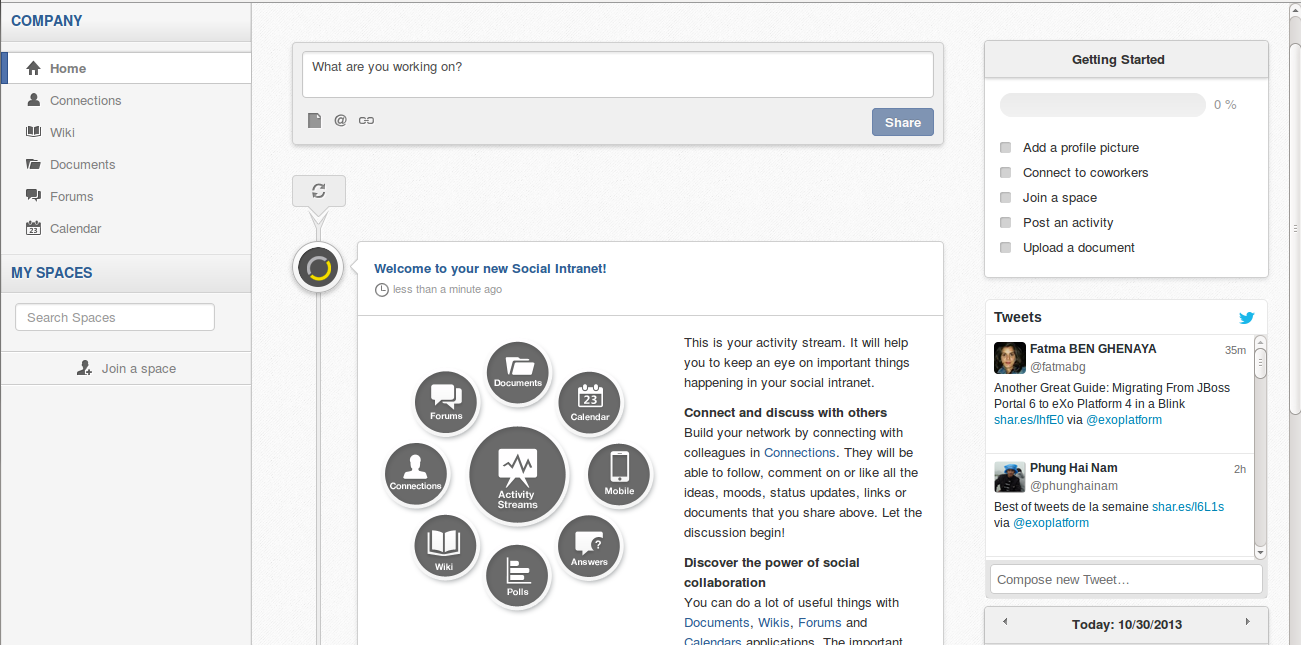
Now you are done with the configuration, so you can insert the new Twitter widget into the intranet homepage. On the homepage, from the “Edit” menu, select Page à Edit Layout. In the editor, simply drag-and-drop the gadget onto the page. Here is the result:
Conclusion
In only four simple steps, you should now have a custom Twitter feed integrated into your homepage. You can also quickly integrate any kind of widget into your portal following this process.
Questions? Remarks? Join the discussion on the eXo Community!
Make the most out of eXo Platform 4
Register to the next webinar and get a complete overview of what you can do with eXo Platform 4. Reserve your seat now!


